 |
| Practices for an Optimized Image |
1. Image Format - JPEG, PNG or GIF?
There are different types of image formats available like JPEG (JPG), PNG and GIF. Mostly, we all use JPEG file format but sometimes we tend to use PNG and GIF as well.
- JPEG format – JPEG format is best used for digital photography and is the most widely used format.
- PNG format – PNG is a lossless format and offers amazing compression. Even if you edit the image multiple times or resize it and compress it, it won’t lose any data or degrade in quality.
- GIF format – GIF format is popular mostly because it supports small size images.
Of all the image formats, the best image format that you can use is JPEG. The reason behind this is very simple. JPEG formats are comparatively smaller in size which means the images will load faster and since you don’t need to edit the images a lot, JPEG format is the best to use in your posts.
2. Use Captions in the Image
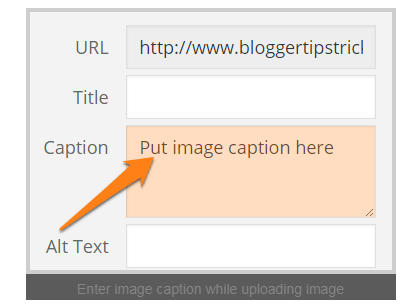
Captions are the text description that appears right below the images in your article. You can use the caption area to describe the image or give credit links.
There is no direct relation between image captions and the search engine rankings. But there are reasons why adding image caption is a really important factor.
The captions are available to you so that you can tell your readers what you are trying to imply by using the image. Sometimes, the readers might get the wrong idea and jump to the wrong conclusions and it’s up to you to provide them with all the information and details before they jump to any conclusions.
By using intelligent and creative captions with creative images, you will spark the readers’ interest, and they might end up spending more time on your site reading the complete article. This will reduce the bounce rate, which in turn will improve your SEO score and increase the chances of the image getting a higher position in the search engine results.
3. Use Image Sitemaps
We all know the importance of sitemaps and the first thing we do when we create a new blog is to build a sitemap and add it to webmasters tools account of various search engines.
When you add a sitemap, you tell the search engines that there are some new pages that need to be crawled and indexed and in this way, you make sure that the search engine spiders are able to crawl each and every page of your site and index it in the search engines.
You create sitemaps for your articles, then why can’t you create image sitemaps as well and increase the chances of the images getting indexed?
Creating image sitemaps is extremely easy as you can All Image Sitemap plugin to create one for the images on your blog and submit it in your Webmasters Tools account. Once you have submitted the sitemap, all the images will be crawled and indexed in the search engines.

No comments:
Post a Comment